Do I Need A Public Adjuster?

pubadjusterbannerAn oft-misunderstood role in the home industry is that of the Public Adjuster.  I recently sat down with one of the top Public Adjusters in the State, Floyd Ostrowsky of Reliant Adjusters Group, to get a better idea of what their profession does and how a homeowner might benefit from working with one.

20141210_084725
Nicola Riettie of Florida Luxury Real Estate Group and Floyd Ostrowsky of Reliant Adjusters Group discuss the role of a Public Adjuster.

1. What is a public adjuster? The simplest answer would be an advocate for the people! A trained and state licensed professional hired by a homeowner and or business owner to represent them in the event of property damage. 

2. Why would a homeowner need a public adjuster? When a homeowner has an insurance claim they are best served having someone who truly knows what they’re entitled to for repairing their home and other expenses. The Insurance companies have their people defending their interests, so it only makes sense that a homeowner does as well. A wise man once told me “You know what you know and you don’t know what you don’t know!” That said, having someone who knows how to manage the claim makes a substantial difference in the homeowner’s financial recovery.   

3. How is a public adjuster different from a staff or independent adjuster? Great question! Both staff adjusters and independent adjusters work for the Insurance company whereas a public adjuster is hired by the insured to represent their interests.

4. When would a homeowner need a public adjuster? It is always best to consult with a public adjuster whenever a homeowner has suffered a property loss. We can review the policy, uncover what is covered and suggest a next best step. 

5. In what circumstances? Public adjusters work specifically on property damage claims so we can assist with all claims arising, from the most common being water damage up to and including a full scale natural disaster such as a hurricane and everything in between, be it flood, mold, lightning strike, fire, smoke, structural, sinkhole, theft and vandalism. Basically if it causes damage to your home it is in the homeowner’s best interest to have a Public Adjuster give it a look.

6. How does a public adjuster get compensated for their services? Another great question, public adjusters work on a contingency basis. Basically we only get paid once the homeowner or business owner receives payment from their insurance company. If they do not receive payment, neither do we – so there is no risk.     

7. When is the right/best time after a disaster for them to contact a public adjuster?  Of course, first things first – take care of your family and mitigate your loss.  Then, in my opinion, it is always best to engage a public adjuster right away. Being engaged from the beginning helps keep the process running smoothly. A good public adjuster can basically start the claim for the homeowner and manage it through completion. That’s not to say it is too late to engage a public adjuster once you’ve started a claim or even if a claim has been denied. Lastly a public adjuster can even reopen a claim up for to five years, if there is relevant reason to do so.

8. How do you find/select the right public adjuster? First, always make sure they are licensed and bonded.  After that, there is nothing better than a referral.  If you know someone who was satisfied with how their claim was managed that would be a good indication or ask for references. At Reliant we are always happy to supply references.  It serves two purposes – it gives new clients confidence and maintains top of mind awareness of those we have worked for in the past. The greater majority of our business is word of mouth – when you are doing the right thing word gets around quickly. 

9. What sets Reliant Public Adjusters apart from its competitors? At Reliant, we pride ourselves on customer service and great communication. Keeping homeowners and business owners in the loop on the status of their claims is a priority. Added to that, we are a team of experienced professionals, each with our own unique backgrounds, myself having 30+ years of negotiation in business experience and my associates, one with a wealth of construction experience and the other formally an independent adjuster working for the insurance companies. As a team we have the knowledge and experience to deal with whatever possibly comes our way.    

Wow, this was amazing information!  We would like to thank Floyd for making the time to BC Frontsit with us to explain his profession so clearly.  You can contact Floyd Ostrowsky of Reliant Public Adjusters at 954.805.3602.


Do Halloween Dangers Lurk at the Entryway of Your Parkland Home?

Halloween-Hero-1-H

Do Halloween Dangers Lurk at Your Entryway?

Happy-Halloween-Scary-2Is your front entryway ready for Halloween visitors? Keep everything fun and accident-free with these seven safety tips.

Everyone loves a good scare on Halloween — as long as it’s just a trick.

To help you avoid any real-life scares — such as falls, fires, and traffic accidents — around your property this All Hallows Eve, play it safe while you’re setting up your Halloween lights and decorations.

Here are seven simple precautions recommended by John Pettibone, curator of Hammond Castle, a Gloucester, Mass., mansion that draws thousands to its renowned 20-room haunted house every Halloween season.

1. Light the Scene

Providing plenty of illumination ensures that your visitors can see where they’re walking, helping to avoid missteps and falls. Pettibone suggests using the highest wattage bulbs your outdoor lighting fixtures can safely take (check the label on the socket), and adding landscape lights every few feet along your front walk.

“We use the solar-powered kind because there’s no wiring needed,” he says. “Just push them into the ground, let them soak up the sun during the day, and they’ll light up the walk after dark.”

2. Secure the Footing

Clear your walk, steps, and stoop of any obstructions that could trip youngsters focused more on tricks and treats than watching where they’re going. That means moving potted mums and jack o’lanterns out of the way, and hammering down any nail heads protruding out of your steps.

If you have a concrete stoop, which can get slippery when wet, apply friction tape ($16 for a 60-foot roll of 1-inch-wide tape) to ensure stable footing, says Pettibone. He also stocks up on chemical ice melt ($20 for a 50-lb. bag) just in case of an early freeze.

3. Tighten the Railings

If your porch railings are wobbly or broken, family members and friends may know not to lean too heavily on them, but Halloween visitors won’t. So hire a contractor or handyman to fix the problem. It’ll make your home safer for guests all year round. Because more strangers come to your front door this night than the rest of the year combined, now is the time to take care of it.

4. Eliminate Fire Hazards

Don’t put real candles into your carved pumpkins or paper lanterns. “That’s a fire waiting to happen,” says Pettibone. Instead, pick up a bulk pack of LED-bulb faux candles, which emit a yellowish, flickering, battery-powered light that looks amazingly similar to the real thing — without the danger.

5. Secure your Property

To prevent burglaries and Halloween pranks — especially on mischief night the previous evening — make sure to keep all windows and doors (other than your main door) locked shut.

You might have an electrician add motion-sensor lights around your property, so anyone who walks down your driveway or around into the backyard will be discouraged from intruding any farther.

6. Set the Scene

In addition to spooky items like cotton cobwebs and half-buried skeletons, consider a few safety-related scene-setters. Pettibone suggests propping open the screen or storm door so it doesn’t get in the way when there’s a big group of kids congregated on your stoop. “We use yellow caution tape to tie open the door,” he says. “You can order it online and it works well with the Halloween theme.” A 1,000-ft. roll of 3-inch-wide caution tape is about $8.

You’ll also want a working doorbell, so if yours is broken, either hire an electrician or handyman to fix it — or install a wireless doorbell in its place.

7. Enhance Street Safety

Four times as many child pedestrians get killed on Halloween night than a normal night. So limit the danger as much as you can by clearing parked cars off the curb to allow better visibility and placing a reflective “watch for children sign” at the edge of the road. For for high-traffic roads in Halloween-intensive neighborhoods, consider posting an adult in the street with a hand-held traffic control light to help maintain safety.

Happy-Halloween-2014-2

From all of us at Florida Luxury Real Estate Group ~

Have a Happy and Safe Halloween!


Article Written By: Oliver Marks - Houselogic.com
 Read more: http://members.houselogic.com/articles/halloween-safety-rules/preview/?cid=eo_em_mkt_rcrnewsletter#ixzz3HSDNVpQL
 Follow us: @HouseLogic on Twitter | HouseLogic on Facebook

Home Inspections – What Every Seller Needs to Know.

Home Inspections – What is Considered a Defect?home_inspection_house

There is almost nothing as challenging as attending a home inspection on a beautiful, seemingly perfect home only to learn that a home inspector has discovered a larger issue which requires significant, costly repairs. Buyers can become apprehensive, sellers can become defensive and the entire transaction can teeter on the brink of collapse.

Several of the home inspections I’ve attended have had a few major items which would be considered surprises by most standards. Combine a surprise with the usual list of other “handy man” issues found in discovery and a home seller can become a bit defensive. The emotions kick in and occasionally a statement along the lines of “now they’re just nitpicking” comes into play.

What I can share about all of the years I’ve been selling real estate is that I’ve never once met a buyer who contacted a home inspector and told them to manufacture a long list of nitpicky-type issues just to upset the seller or to create a reason to get out of the contract.

During a home inspection what is or is not considered a defect? Very often, consumers are confused about what is considered a defect, a broken item, something that needs repaired by the seller prior to closing. There rarely is a gray area. The contract that both the buyer and seller executed likely delineates what is actually considered a defect and the course of action to remedy those items.  Essentially, things that are meant to function must, in fact, function as they were intended.

The home inspector has been hired to do one thing, thoroughly assess the entire home for a buyer so that they completely understand the condition of the home that they’re buying. Every single item, big or small, not working in the capacity for which it was designed will be itemized on the list. Very often, even cosmetic items are, at the very least, noted on the list just so the buyer understands that there are cracked tiles or stains or whatever the anomaly may be.

So, to help avoid any surprises and added stress down the road here are a few tips for home sellers to get through the inspection period and to the closing table:

  • Prior to signing the sales contract a seller should fully understand their financial and contractual responsibility for remedying defects discovered in an inspection.
  • When in doubt, disclose. It doesn’t matter how long ago it happened be it a fire, flood, a roof leak – disclose everything.
  • Home inspections may have changed since you last purchased or sold a home. Inspectors now use specialized equipment such as thermal imaging and air quality testing to find nearly invisible defects such as faulty wiring, moisture intrusion and mold.
  • Whatever the defect is, it doesn’t matter “if it was like that when you bought it”. It will be a defect on an inspection report.
  • Love the one you’re with. Warts and all, do your best to work out the transaction at hand. If the buyer walks, the items from the home inspection report may have to be disclosed to the next buyer. The inevitable repair is only going to be delayed and potentially interfere with the next transaction and may even result in a lower selling price down the road.
  • Don’t get upset about a lengthy list of repairs. The home inspector is doing their job and the buyer is getting what they pay for, a thorough inspection.

10 Inside Tips From a Designer Who Specializes in Small Baths

MerrylandsBathrooms-938x704

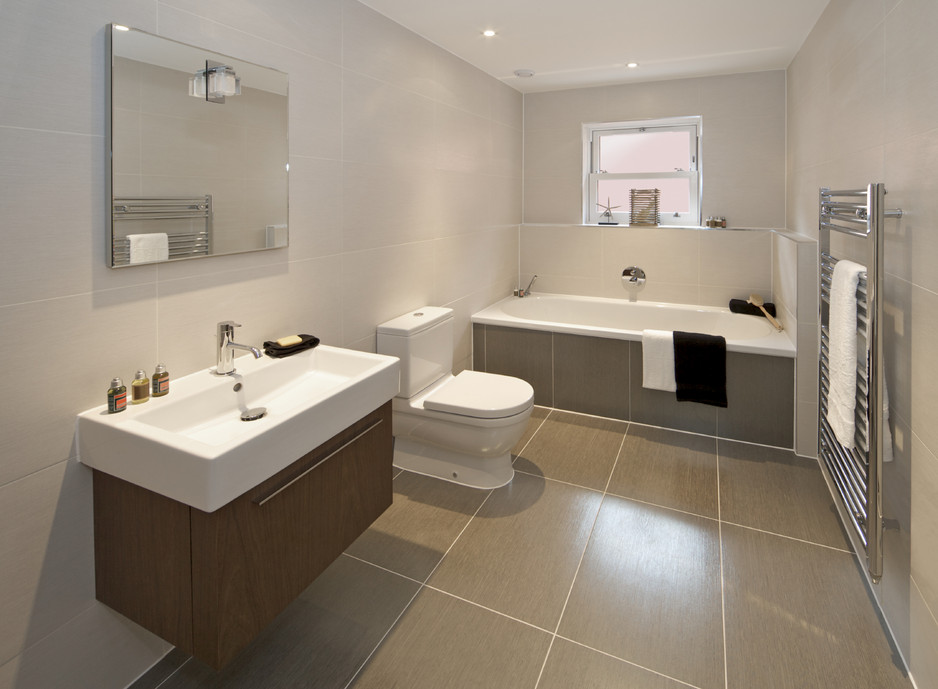
A New York City designer shares secrets to making a small bath both functional and beautiful.


Got a small bathroom to renovate? Go wild with texture and colors if it’s a rarely used guest bath, but stick to clean and simple in a master bath.

That’s the word from designer Jamie Gibbs, who transforms incredibly small New York City bathrooms into beautiful spaces. “I liked being shocked by details in a little space, especially if it’s not going to be used much,” Gibbs says.

His small-bath secrets:

1. Avoid textures in bathrooms that get daily use. In a heavily used bathroom, kohler-boucle-textured-color-lavatory-camberanything with texture becomes a collection spot for mold, mildew, and toothpaste. Say no to carved vessel sinks or floor tile with indentations.

2. Be careful with no-enclosure showers with drains right in the floor. These Euro showers allow for a feeling of openness, but the average American contractor doesn’t know how to waterproof the floor for them, Gibbs says. The tile seals can be compromised if not installed correctly, causing the materials to decompose, and water to leak underneath.

3. Use opaque windows and skylights to let light filter into all parts of the bath. A long skinny window with frosted glass means you don’t have to burn high-wattage light bulbs. Make sure water condensation will roll off the window into an appropriate place (i.e. not the framing or the wall) to avoid future maintenance issues.

4. Look for fixtures that have a single handle rather than separate hot and cold taps. “Space-saving gearshift faucets are a very good choice in small bathrooms,” says Gibbs. You’ll also save money by not having to drill holes in the countertop for the hot and cold taps.

5. Save space with wall-mounted toilets and bidets, but be aware that the water bathroom-design-ideas-for-teenage-girls-28tank goes into the wall. That’s fine if space is such a premium that you won’t mind going into the wall to make any repairs. But if you share a wall with a neighbor, that’s a different issue.

6. Use a wall-mount faucet to make a reduced-depth vanity work in a small space. “I can get away with a 22” vanity instead of a 24” vanity with a wall mount faucet,” Gibbs says.

7. Check the space between the handles and the faucet of any space-saving fixtures. “If you can only get a toothbrush in it to clean, you’ll save space, but it’s functionally stupid,” Gibbs says. Make sure the sink is functional, too. If you’re using a vessel sink, make sure it’s large enough and not too high. “If it’s too high, you’ll knock it so many times that the fittings will come loose,” Gibbs says.

8. A pedestal sink is all form and no function. “It’s a great-looking sink, but there’s no place to [set] anything,” Gibbs says.

9. Wall-mounted vanities seem like they’re space savers, but they create dead space between the vanity and the floor — a space that often accumulates junk and never gets cleaned.

10. If you’re comfortable with it, go European and put up a glass walls between the bathroom and bedroom to create the illusion of space. Or put bathroom fixtures in the bedroom just outside the bath.

Article Written By: Dona DeZube of HouseLogic

Upgrade to Sell…

Thinking of selling your home and want to do some upgrades to maximize your resale value?  If so, you’re in exactly the right place.  We have some great, realistic tips that will help you make the most of your upgrade time and dollars and offer the best pay off.

  1. The main things to keep in mind are: neutral, clean and classic. Every prospective buyer is going to have their own taste.  Using a neutral palette will allow them to see the home as move-in-ready, yet simple to personalize as desired.
  2. Consider several small projects throughout the house like updating fixtures, fittings and finishes.  Buyers look at the overall package as opposed to one standout feature.
  3. Update light fixtures in the kitchen, baths and hallways.  Replacing dated fixtures instantly updates your home.
  4. Always remember that the key locations for upgrades are the kitchen and baths.  Buyers typically feel that these are the most important home features they look for and consider to be more costly or time consuming than they want to undertake themselves.
  5. Clean your home to sparkling condition!  Cleaning the floors and grout between the tiles,  the windows and home exterior are key to your home showing well in comparison to others.  Make sure to clean any rust stains from the exterior and on the inside, clean all vents & doors as well as cleaning and resealing grout in the bathrooms and kitchen.

For more ideas on how to get your home in show-ready condition, leave us a comment or send us an email at NICOLA@FLLUXREG.COM…

Hot Home Trends…

The hottest new Home Design Trends reflect the transition from the McMansion Era to simpler spaces that have the ideal flow, layout and design for utility and enjoyment of a home.  Take a look at the hottest new trends:

Trend #1: Convertible Spaces

Forget “museum rooms” we use twice a year (dining rooms and living rooms) and embrace convertible spaces that change with our whims. Foldaway walls turn a private study into an easy-flow party space. Walls can consist of fancy, glass panels ($600 to $1,600 per linear ft., depending on the system); or they can be simple vinyl-covered accordions ($1,230 for 7 ft. by 10 ft.). PortablePartions.com sells walls on wheels ($775 for approximately 7 ft. by 7 ft.). A Murphy bed pulls down from an armoire-looking wall unit and turns any room into a guest room. Prices, including installation and cabinetry, range from $2,000 (twin with main cabinet) to more than $5,000 (California king with main and side units). Just search online for sellers. And don’t forget area rugs that easily define, and redefine, open spaces.

Trend #2: A laundry room of your own…

Humankind advanced when the laundry room arose from the basement to a louvered closet on the second floor where clothes live. Now, we’re taking another step forward by granting washday a room of its own. If you’re thinking of remodeling, turn a mudroom or extra bedroom into a dedicated laundry room big enough to house the washer and dryer, hang hand-washables, and store bulk boxes of detergent. Look for spaces that already have plumbing hookups or are adjacent to rooms with running water to save on plumbing costs.

Trend #3: Souped-up kitchens

Although houses are trending smaller, kitchens are getting bigger, according to the American Institute of Architects’ Home

Design Trends Survey. Kitchen remodels open the space, perhaps incorporating lonely dining rooms, and feature recycling centers, large pantries, and recharging stations. Oversized and high-priced commercial appliances—did we ever fire up six burners at once?—are yielding to family-sized, mid-range models that recover at least one cabinet for storage. Since the entire family now helps prepare dinner (in your dreams), double prep sinks have evolved into dual-prep islands with lots of counter space and pull-out drawers.

Trend #4: Energy diets

We’re wrestling with an energy disorder: We’re binging on electronics—cell phones, iPads, Blackberries, laptops–then crash dieting by installing LED fixtures and turning the thermostat to 68 degrees. Are we ahead of the energy game? Only the energy monitors and meters know for sure. These new tracking devices can gauge electricity usage of individual electronics ($20 to $30) or monitor whole house energy ($100 to $250). The TED 5000 Energy Monitor ($240) supplies real-time feedback that you can view remotely and graph by the second, minute, hour, day, and month.

Trend #5: Love that storage

As we bow to the new god of declutter, storage has become the holy grail. We’re not talking about more baskets we can trip over in the night; we’re imagining and discovering built-in storage in unlikely spaces–under stairs, over doors, beneath floors. Under-appreciated nooks that once displayed antique desks are growing into built-ins for books and collections. Slap on some doors, and you can hide office supplies and buckets of Legos. Giant master suites, with floor space to land a 747, are being divided to conquer clutter with more walk-in closets.

Trend #6: Home offices come out of the closet

Flexible work schedules, mobile communications, and entrepreneurial zeal are relocating us from the office downtown to home. Laptops and wireless connections let us telecommute from anywhere in the house, but we still want a dedicated space (preferably with a door) for files, supplies, and printers. Spare bedrooms are becoming home offices and family room niches are morphing into working nooks. After a weekend of de-cluttering, basements and attics are reborn as work centers.

Staging a home for sale can also greatly benefit from these tips and styles.  Buyers like to see how they can use the space to best suit their needs.  For more information on how to use these trends for Home Staging, give us a call at (702) 538.2294…

Some Content Originally Written By Lisa Kaplan Gordon – a HouseLogic contributor and homebuilder.